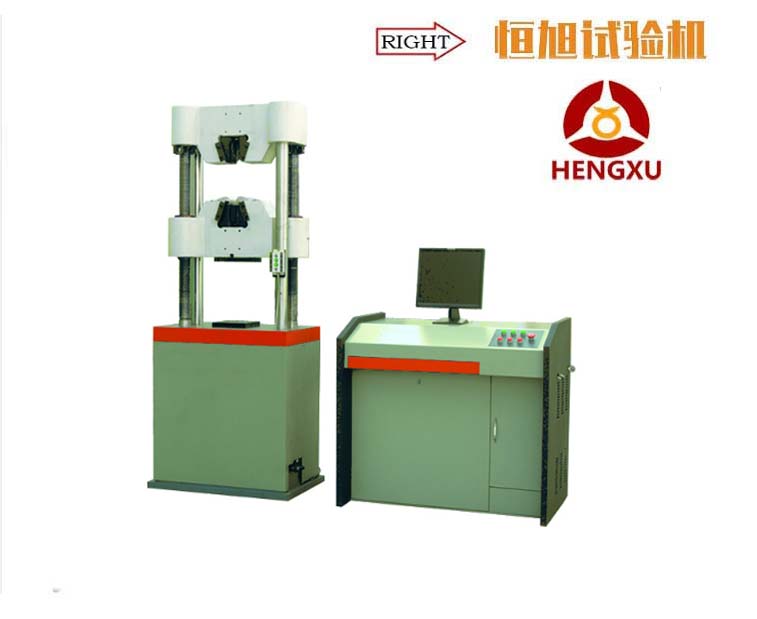
WAW-600B microcomputer controlled hydraulic universal testing machine
Brief introduction:The WAW series microcomputer controlled electro hydraulic servo universal
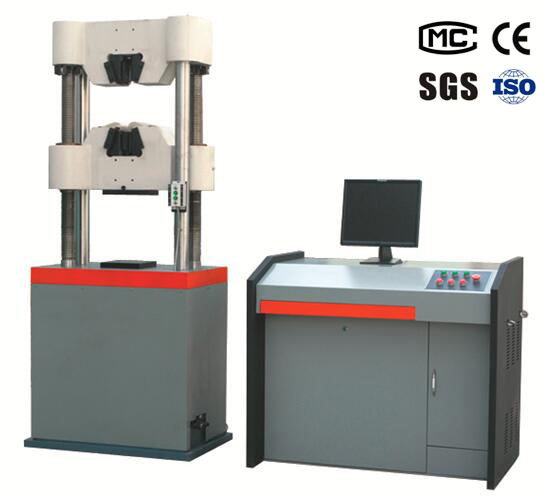
1. Equipment parameters and configuration
Technical parameters | To configure |
1. the maximum test force: 600kN; 2. grade of test machine: Grade 1; 3. the test force is divided into two parts: the whole process is not divided into four equivalent files. 4. the effective range of testing force is 2% to 100%FS. 5. force resolution: 1/300000; 6. the accuracy of test force is better than that of indication value by 1%. 7. extensometer standard distance: 50mm; 8. the range of deformation measurement: 0-15mm; The effective measurement range of 9. deformation: 2% ~ 100%FS; 10. deformable resolution: the maximum deformation of 1/300000; 11. the accuracy of deformation measurement is better than that of indication value of 0.5%. The range of 12. displacement measurement: 0 ~ 250mm; 13. the limit error of displacement indication is better than that of indication value of 1%. 14. displacement resolution: 0.01mm; 15. control mode: constant stress, constant deformation and constant displacement three closed loop control. 16. isokinetic stress control range: 2 ~ 60N/mm2. S-1 17. the relative error of stress rate is better than the set value of less than + 5%. 18. constant speed strain control range: 0.00025/s ~ 0.0025/s 19. relative error of strain rate: better than set value of less than + 5%. 20. control range of isokinetic displacement: 0.2 ~ 70mm/min 21. the relative error of displacement velocity is better than the set value of less than or equal to 5%. 22. software and interface: software and interactive man-machine interaction interface in WINDOWS operating environment; 23. cylinder stroke: 250mm; 24. the maximum distance between the tensile jaws: 650mm; 25. the maximum distance between the compressed surfaces: 550mm; 26. column spacing: 540mm; The diameter of the 27. round specimen is: 13 ~ 40mm; The maximum clamping width of 28. flat specimens: 75mm; 29. flat specimen holding thickness: 0 ~ 15mm; 30. upper and lower pressure plate size: 160mm or 204 x 204mm (matching); 31. the distance between bending roller: 30 ~ 600mm; 32. the width of the bending roll: 140mm; 33. bending roll diameter: diameter 30mm (marking); The maximum moving speed of the 34. piston: 70mm / min; 35. the adjustment speed of the lower beam: 120mm / min; 36. mainframe size: 810 x 560 x 2050mm; 37. the size of the piano oil source control cabinet is 960 x 630 x 900mm; 38. power supply: 380V + 10%/50Hz/ three-phase five wire system. 39. equipment power: oil pump motor power 1.5kW; The power of the motor is 0.55kW on the top and bottom of the beam. 40. host weight: 2100Kg; 41. harp type oil source control cabinet weight: 420kg. | 1. 600KN double column double screw oil cylinder under one host. 2. harp type oil source control cabinet set: 3. the oil pump adopts the imported gear engaging pump of Italy Mazu. The 4. motor adopts the "South Anhui" motor. 5. step up valve reversing valve adopts Rexroth three position four way solenoid valve; 6. use "Rexroth" overflow valve; 7. high precision electro-hydraulic proportional servo valve and valve block set. 8. other main components are "dawn hydraulic". The 9. piano type oil source control cabinet shell is treated by full plastic spraying. 10. high precision pressure sensor; 11. a set of high precision displacement measuring device; 12. a high precision electronic extensometer a YYU15/50; 13. auxiliary equipment configuration of test machine; 14. hydraulic automatic fixture set; 15. drawing accessories with one set: Circular specimen jaw: 13 to 26mm, and 26 to 40mm. Flat sample fixture: 0 ~ 15mm one payment; 16. a set of compressing accessories: 17. upper and lower pressure plate size: 160mm or 204 x 204mm (matching); A set of 18. three point bending accessories: 19. the distance between bending roller: 30 ~ 600mm; 20. the width of the bending roll: 140mm; 21. bending roll up and down diameter: 3 * 30MM (standard); 22. Lenovo brand computer; 23. color inkjet printer; 24. precision full digital servo control amplifier one set 25. a set of high performance software for HXT testing machine under WINDOWS operating environment. 26. HXT AD800 full digital data acquisition card. |
Two. Main uses:
The WAW series microcomputer controlled electro hydraulic servo universal testing machine is mainly used for tensile test, compression and bending test of metallic materials. The concrete, brick, tile, rubber and their products can be tested after adding the corresponding accessories.
This machine is made up of a dual column, double screw cylinder, lower cylinder main engine and a piano type oil source control cabinet. The oil pump adopts the low noise and high performance gear pump imported from Italy Mazu. The drawing space is above the main engine, and the compression and bending test space is located between the main beam and the work table. The adjustment of the test space is realized through the movement of the middle beam, and the middle beam is lifted by chain drive.
This machine adopts computer automatic closed-loop control, sensor force measurement, computer screen real-time display, storage and printing function, and sample hydraulic automatic clamping. After the test, the maximum force, tensile strength, yield strength, modulus of elasticity, elongation after failure and shrinkage of the section were obtained automatically.
Three. Function and characteristics:
The special super thick pincer seat makes the jaw fully contained in the seat of the jaw when holding the sample with the jaw, so that the clamp is more reliable, and the possibility of the deformation and damage of the horn shape is eliminated, and the service life of the equipment is greatly improved.
The wear-resistant lining plate is added between the jaw seat and the clamp plate, and the phenomenon that the oxide skin falls into the scrap of the slant surface of the jaw seat is eliminated during the metal stretching process, making the clamping process more slippery and more firmly clamped.
The machine has stable balance, low noise, high efficiency and wide speed range.
Four. The introduction of software function
(I) the advantages of the system:
(1) the whole system has no potentiometers and other adjustable devices.
(2) the system is all digital design with high accuracy, stability and safety.
(3) the system adopts digital zero adjustment and parameter calibration.
(4) the system control parameters can be automatically calibrated without the occurrence of the phenomenon that the system can not be used after the technician has left.
(5) after the test, the system automatically analyzes the test data and curves, and can also be analyzed under manual intervention.
(6) special test reports can be customized according to customer requirements.
(7) system software integrates more than thirty national standards or test methods such as GB/T228-2002;
(8) the software is simple and easy to operate.
(9) the software can display the loading speed of the load;
(10) query, print and browse test data through the network.
(two) brief introduction of measurement and control acquisition card:
(1) the appearance of the measurement and control acquisition card
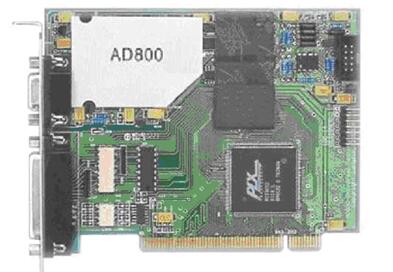
A brief introduction to the circuit of measurement and control acquisition card.
The AD800 full digital data acquisition card is a built-in microcomputer PCI test card based on PCI interface, which is in line with the PCI2.1 specification. The card can be inserted directly into any PCI inserting slot of the microcomputer. Through a simple connection, the card can be directly connected to the test machine, and the microcomputer automatic measurement and control can be realized, and the plug and play can be really done. The AD800 universal test card integrates programmable amplifier A/D conversion, digital I/O, counting and pulse occurrence (PWM), square wave occurrence (SWP) and other functions. Its system structure is reliable and simple, and has very good interchangeability.
(3) the technical performance of AD800 acquisition card:
The whole system adopts digital design, which is safe, stable, reliable and high precision.
There is no adjustable device in the whole system, digital zero adjustment and automatic calibration of measurement and control parameters.
The system integrates CPLD computing devices with high speed operation ability and real-time processing of digital signals.
This system adopts PCI2.1 bus standard, easy to expand, easy to upgrade and plug and play.
Automatically check zero.
Nine. Brief introduction of measurement and control software:
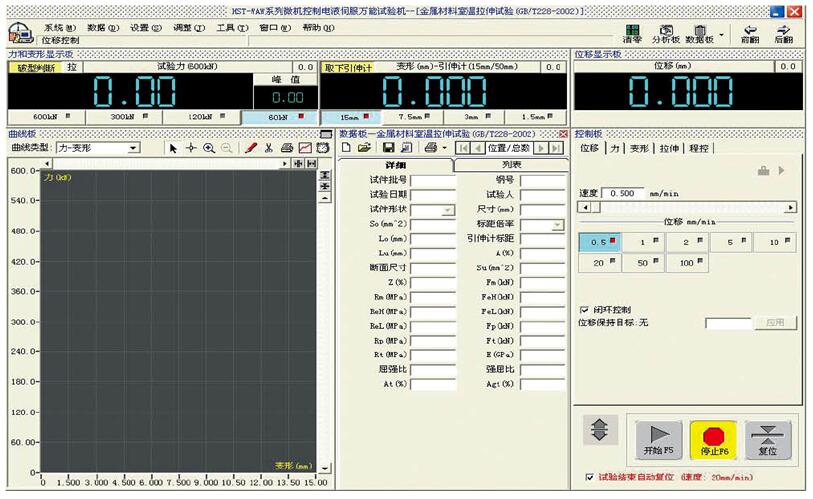
(1) introduction of MaxTest software:
Based on the WINDOWS operation platform, the software is simple and powerful, and has a human-machine conversation structure.
Four digit digital display test force value, accuracy for each gear range 20% starts to show the value of + 1%;
In four files, the digital display is deformed, and the accuracy is 20% for each gear range 20%.
At the same time, recording force time, deformation time, force deformation test curve, can switch observation at any time, random zoom down, horizontal or vertical movement, real-time high-speed sampling;
On the basis of automatic analysis, the results of elastic modulus, yield strength, tensile strength and so on are automatically calculated at the end of the test, and the accuracy of the analysis can be improved by manual analysis.
Test data is managed by standard database, and all test data and curves are automatically saved.
During test, the test curve is displayed in real time. After testing, the test data, curves and information of the test piece will be displayed in this operation window.
This set of control software has now integrated more than 100 national standards or test methods, so many national standards can meet the needs of customers' multifaceted test. The test report method can be customized and updated at any time according to the needs of the customer, which can bring great convenience to the customers.
The database can be Querying Historical test data, and only need to input certain conditions to find the test data immediately.
The force and deformation can be automatically calibrated. After we have completed the debugging, if the user is not allowed to feel the indication or the measurement parameters are changed, only click the automatic correction button, and the system parameters will be restored to the state of the debug.
Only use the mouse to operate on the two acquisition channels can be zero, the system is usually only once zero zero, in normal use, the system will automatically return to the real zero point;
A group of similar samples can be aggregated and analyzed, and the measured data can be compared and the average value can be calculated, so that the samples can be aggregated and printed in batches.
It provides a variety of report print formats, and users can edit reports of any format according to needs (batch processing, control programmer, MaxDoc report processor, MaxXls report processor, etc.).
Five. Quality assurance
After the formal acceptance of the equipment, the equipment shall be regarded as a formal delivery. The three period of the equipment is one year from the date of formal delivery (except for the other delay stipulated by the supplier). In the three package period, the supplier will service and repair all kinds of malfunctions of the equipment in time. During the operation of the warranty, the supplier will be in trouble with the ordering party and assist the ordering party to complete the maintenance task.
Six, after sale quality service
1. After the formal acceptance of the equipment, the equipment shall be regarded as a formal delivery. The three package period is one year from the date of formal delivery. The longest quality of individual parts is 3 years
2. Training
(1) our test crew arrives at the demand side, and our personnel arrive at the scene to debug. Free of charge for 1-2 operators of the demand side, the training place can be in the demand side company, or in our company.
(2) training must be carried out correctly using test machines, software operations and general maintenance and troubleshooting.
3. Maintenance service
(1) the consulting service provider will answer the questions on the phone or written in writing at any time.
(2) during the period of fault maintenance, the supplier will make a troubleshooting plan for the users within 24 hours and notify the users. If the supplier fails to solve the problem, the supplier will send someone to the service.
(3) only the maintenance cost is charged for the failure or damage caused by the natural person during the warranty period.
4. The following conditions are not in the scope of warranty
(1) failure or damage caused by abnormal operation and man-made or natural disasters.
(2) without our consent, we will demolished the damaged parts (such as microcomputer, mainframe, line, etc.).
(3) without our consent to install the virus software, arbitrary delete computer files or autolysis registration number can not work normally cause the test machine can not work.
5. Update service
(1) upgrade test software for users free of charge, and expand the experimental function for users.
(2) other accessories purchased by the user only charge materials and processing fees, and no management fees are charged.
Ji'nan Heng Xu Test Machine Technology Co., Ltd.
Contact phone: 0531-85860713
Fax: 0531-85860723
Cell phone: 18678808533 Liu Wenju


